
U-bolt rope clamps serve as essential hardware in countless applications, from securing boat rigging to creating sturdy cable railings. These simple yet effective fasteners provide reliable connections when installed properly. However, incorrect installation can lead to dangerous failures and costly accidents. This comprehensive guide walks you through the entire process, ensuring your connections remain safe and secure for years to come.
Understanding U-Bolt Rope Clamps and Their Components
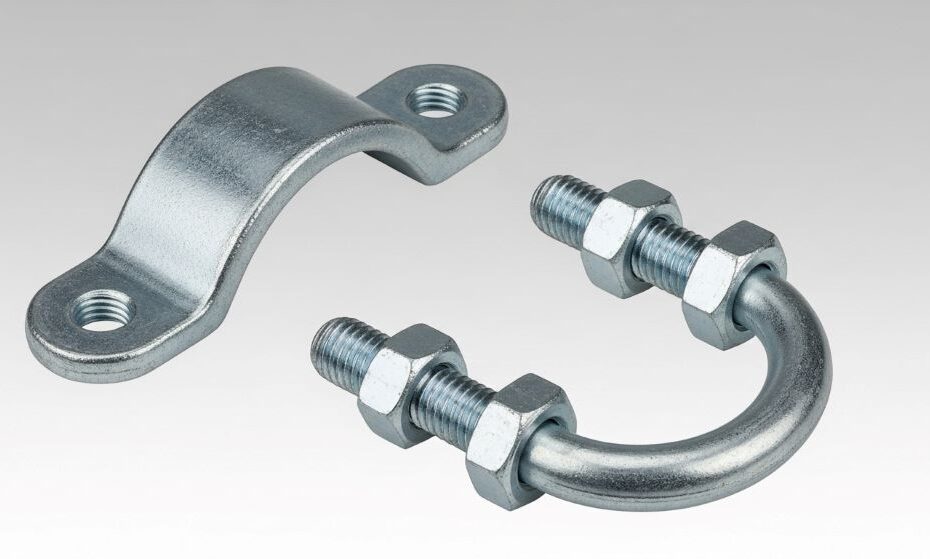
Before starting any installation, familiarize yourself with the parts involved. A typical saddle clamp consists of three main components that work together to grip the rope securely. The U-shaped bolt wraps around the rope, while the saddle piece distributes pressure evenly across the rope’s surface. Two nuts tighten onto the bolt’s threaded ends, creating the clamping force needed for a strong connection.
These clamps come in various sizes to accommodate different rope diameters. Choosing the correct size is crucial for proper function. A clamp that’s too small won’t fit around your rope, while one that’s too large won’t grip effectively. Therefore, always measure your rope diameter before purchasing clamps.
Why Proper Installation Matters
Many people underestimate the importance of correct installation techniques. Improper placement can reduce a clamp’s holding strength by up to 80 percent. This dramatic reduction creates serious safety hazards, especially in load-bearing applications. Furthermore, incorrect installation causes premature rope wear and potential failure under stress.
Professional riggers and contractors understand these risks. They follow strict installation protocols to ensure maximum safety and reliability. By learning these same techniques, you can achieve professional-quality results in your own projects.
Essential Tools and Materials You’ll Need
Gathering the right tools beforehand makes installation smoother and more efficient. You’ll need an appropriately sized wrench or socket set to tighten the nuts. A torque wrench proves invaluable for achieving proper tightness without over-tightening. Additionally, having a measuring tape helps ensure correct spacing between multiple clamps.
Beyond tools, prepare the rope itself. Cut it to the desired length using proper cutting tools. Wire cutters work well for steel cables, while sharp scissors or a hot knife suit synthetic ropes. Clean the rope ends to remove any dirt or debris that might interfere with the clamp’s grip.
Determining the Correct Number of Clamps
Using enough wire rope clip fasteners is critical for safe connections. The required number depends on your rope’s diameter. Small diameter ropes under one-quarter inch typically need two clamps. Medium ropes between one-quarter and one-half inch require three clamps. Larger ropes demand even more clamps to distribute the load properly.
Never skimp on the number of clamps to save money. The cost difference is minimal compared to the potential consequences of failure. Moreover, building codes and safety regulations often specify minimum clamp quantities for different applications. Always err on the side of using more clamps rather than fewer.
The Golden Rule of Installation
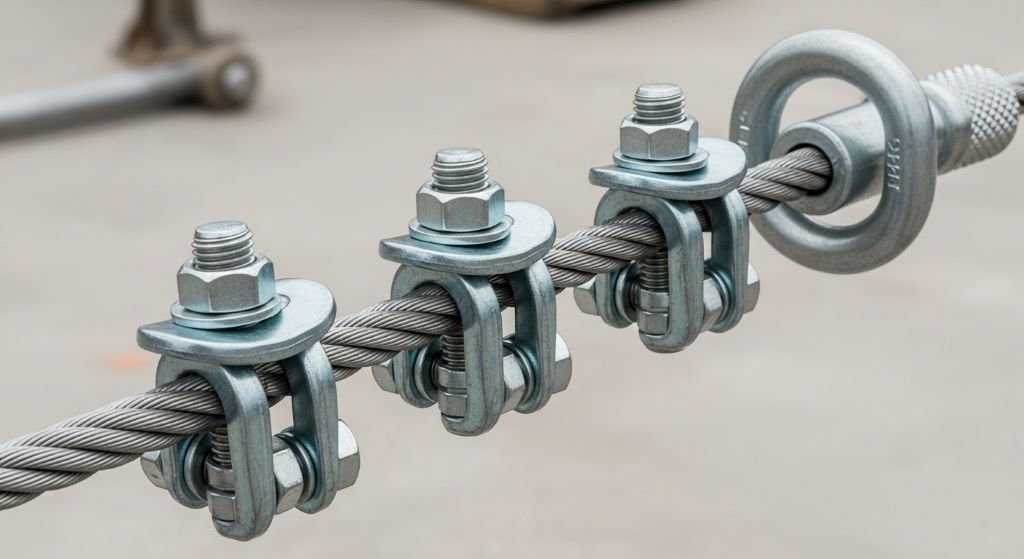
Here’s the most important principle to remember: never saddle a dead horse. This old rigging saying means the saddle portion always goes on the live end of the rope, not the tail end. The U-bolt portion presses against the dead or tail end. This configuration ensures the rope bears the load on the saddle’s smooth surface rather than on the sharp U-bolt edges.
Reversing this arrangement causes the rope to bend sharply over the U-bolt under load. This creates stress concentrations that significantly weaken the rope and accelerate wear. Therefore, double-check the orientation of every clamp before tightening.
Step-by-Step Installation Process
Start by forming a loop or eye in your rope to the desired size. Thread the rope back alongside itself, creating the section where clamps will attach. Slide the first clamp onto both rope sections approximately one rope width away from the loop’s bottom.
Position the saddle on the standing or live part of the rope. The U-bolt should press against the tail end. This correct orientation is absolutely essential. Hand-tighten both nuts evenly until the clamp grips both rope sections firmly but not excessively.
Install the second clamp as close to the rope end as possible. This placement prevents the tail from slipping through under load. Again, ensure proper saddle orientation before tightening. Add any additional clamps between these two, spacing them evenly along the rope length.
Achieving Proper Tightness
Tightening the nuts requires careful attention to achieve optimal results. Turn both nuts alternately to maintain even pressure across the clamp. This prevents the clamp from tilting or canting sideways. Continue tightening until the rope compresses slightly but doesn’t deform excessively.
Using a torque wrench eliminates guesswork from this process. Manufacturer specifications provide recommended torque values for different clamp sizes. Generally, tighten until you achieve about 80 percent of the recommended torque initially. You’ll perform a final tightening after the rope settles under load.
Over-tightening damages the rope’s internal structure. You’ll notice flattening or crushing of the rope if you’ve gone too far. Conversely, under-tightening allows slippage and reduces holding strength. Finding the right balance takes practice, but following torque specifications helps tremendously.
Proper Spacing Between Multiple Clamps
When using multiple clamps, spacing them correctly maximizes holding power. A good rule of thumb places clamps about six rope diameters apart. For example, a half-inch rope requires approximately three inches between clamp centers. This spacing allows each clamp to grip effectively without interfering with adjacent clamps.
The first clamp sits one rope width from the loop bottom, as mentioned earlier. The last clamp positions as close to the tail end as practical. Distribute remaining clamps evenly between these anchor points. Consistent spacing creates uniform load distribution along the connection.
Initial Testing and Load Application
After installation, apply light tension to the connection before putting it into full service. This initial loading helps the rope settle into the clamps. You’ll notice slight movement as the rope fibers compress and conform to the clamp shape. This settling is normal and expected.
Monitor the connection closely during this break-in period. Check that all clamps remain properly positioned and oriented. Look for any signs of slippage or rope damage. Additionally, verify that the loop maintains its intended size and shape under tension.
The Critical Re-Tightening Step
Here’s a step many people forget, yet it’s crucial for long-term reliability. After the connection experiences its first significant load, re-tighten all clamps. The initial loading causes rope fibers to compress and seat into the clamps. This settling reduces the clamping pressure, requiring adjustment.
Wait until the rope has been under tension for several hours or completed several load cycles. Then systematically go through each clamp and tighten the nuts to full torque specifications. This second tightening restores proper clamping force and ensures maximum holding strength.
Schedule regular inspections and re-tightening as part of your maintenance routine. Vibration, temperature changes, and repeated loading can loosen clamps over time. Therefore, periodic checks prevent gradual deterioration of connection strength.
Common Installation Mistakes to Avoid
Even experienced installers sometimes make errors that compromise safety. Mixing clamp sizes on a single connection creates uneven pressure distribution. Using damaged or corroded clamps reduces holding strength significantly. Installing clamps with the saddle on the wrong side remains the most dangerous mistake.
Another common error involves over-tightening in an attempt to achieve extra security. This actually weakens the connection by damaging the rope’s structure. Similarly, using too few clamps for the rope diameter creates inadequate holding power. Always follow manufacturer guidelines and industry standards.
Failing to re-tighten after initial loading lets connections loosen gradually. This oversight accounts for many rope failures in the field. Moreover, neglecting regular inspections allows problems to develop unnoticed until catastrophic failure occurs.
Special Considerations for Different Rope Types
Steel wire rope requires specific attention to prevent fraying. The rope ends should be properly seized or fitted with thimbles before installing clamps. Galvanized clamps work best with galvanized rope to prevent corrosion issues. Stainless steel clamps suit stainless rope for maximum corrosion resistance.
Synthetic ropes behave differently under clamping pressure. They’re more susceptible to crushing and deformation from over-tightening. Use slightly lower torque values compared to steel rope of similar diameter. Additionally, synthetic ropes may require more frequent re-tightening as they stretch and settle.
Applications and Load Ratings
U-bolt clamps serve numerous purposes across various industries. Marine applications use them for standing rigging, lifelines, and anchor systems. Construction sites employ them for temporary hoisting and safety lines. Agricultural operations utilize them for fencing and equipment securement.
Understanding load ratings prevents overloading and failure. Each clamp size has a working load limit based on proper installation with adequate numbers. Never exceed these ratings, and always include an appropriate safety factor. Most professionals use a 5:1 safety factor, meaning the rope’s breaking strength should be five times the maximum expected load.
Inspection and Maintenance Guidelines
Regular inspections catch problems before they become dangerous. Examine clamps monthly in critical applications or quarterly for less demanding uses. Look for loose nuts, corrosion, deformation, or rope damage near the clamps. Tighten any loose nuts immediately and replace damaged components.
Check the rope itself for wear, broken strands, or kinking. These issues often appear first near the clamps where stress concentrations are highest. Furthermore, inspect the loop or eye for distortion or slippage. Any significant changes in loop size indicate inadequate clamping or rope damage.
Document your inspections to track connection condition over time. Note the date, findings, and any maintenance performed. This record helps identify developing problems and demonstrates due diligence for safety compliance.
When to Replace Clamps and Rope
Even properly maintained connections don’t last forever. Replace clamps showing significant corrosion, deformation, or thread damage. Bent or twisted clamps can’t apply proper clamping pressure. Stripped threads prevent achieving adequate tightness.
The rope itself requires replacement when showing significant wear. Look for broken strands, severe corrosion, kinking, or diameter reduction exceeding 10 percent. Additionally, replace rope that has been shock-loaded beyond its capacity, even if no visible damage appears.
Don’t try to repair damaged clamps or reuse them in critical applications. The small cost of new hardware pales in comparison to the consequences of failure. Your safety and the safety of others depend on using components in good condition.
Conclusion
Installing a U-bolt rope clamp correctly requires attention to detail and adherence to proper techniques. Remember the golden rule of placing the saddle on the live end while the U-bolt presses against the tail. Use the correct number of clamps for your rope diameter and space them appropriately. Tighten to proper torque specifications without over-tightening or under-tightening.
The critical re-tightening step after initial loading ensures long-term reliability. Regular inspections catch developing problems before they become dangerous. By following these guidelines, you’ll create secure connections that perform safely under load. Whether you’re working on a boat, a construction site, or a home project, proper installation techniques provide peace of mind and lasting results.
Frequently Asked Questions
What happens if I install the clamp backwards with the U-bolt on the live end?
Installing clamps backwards dramatically reduces holding strength by forcing the rope to bend sharply over the U-bolt edges under load. This creates stress concentrations that weaken the rope and accelerate wear, potentially leading to premature failure. Always position the saddle portion on the standing or live end of the rope.
How tight should I make the nuts on a U-bolt clamp?
Tighten nuts until the rope compresses slightly without visible crushing or deformation. Using a torque wrench set to manufacturer specifications ensures proper tightness. Typically, start at 80 percent of recommended torque, then re-tighten to full specifications after the rope settles under initial loading.
Can I reuse U-bolt clamps after removing them from a rope?
Reusing clamps in critical applications is not recommended. The clamping process deforms both the rope and the clamp slightly, affecting their ability to grip properly when reinstalled. Additionally, threads may become damaged during removal. For safety-critical applications, always use new clamps.
How often should I inspect and re-tighten rope clamps?
Inspect clamps monthly in critical or high-load applications, and quarterly for less demanding uses. Re-tighten after the first significant loading when the rope settles, then check periodically as part of regular maintenance. Vibration, temperature changes, and repeated loading cycles may require additional tightening.
What size clamps do I need for my rope diameter?
Clamp size must match your rope diameter exactly. Measure the rope carefully and consult manufacturer sizing charts. Using clamps that are too small won’t fit properly, while oversized clamps won’t grip effectively. Additionally, verify you’re using the correct number of clamps for your rope diameter to ensure adequate holding strength.
Related Topics:
How to Use Cordless Skipping Rope
What is the Stopper for Wire Rope