
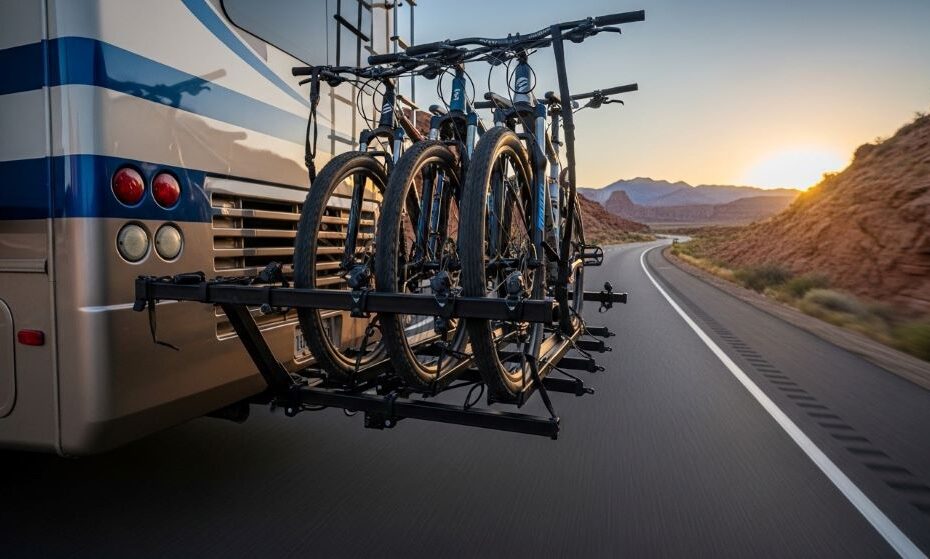
Traveling in a recreational vehicle opens up countless opportunities for adventure and exploration. Adding bicycles to your journey extends that freedom even further, allowing you to explore campgrounds, trails, and nearby towns without moving your entire RV. However, transporting bikes safely requires the right equipment and careful consideration of your specific needs.
Choosing a bike rack for your recreational vehicle involves more than simply picking the first option you find online. Your RV’s design, the number of bikes you want to carry, and your travel style all influence which solution works best. Additionally, safety concerns and legal requirements play crucial roles in making the right decision.
This comprehensive guide will walk you through everything you need to know about selecting the perfect bike carrier for your RV adventures. You’ll learn about different mounting styles, weight capacities, compatibility issues, and essential features that separate quality products from disappointing purchases. By the end, you’ll have the knowledge to make an informed choice that keeps your bikes secure mile after mile.
Understanding RV-Specific Requirements
Recreational vehicles present unique challenges compared to standard cars or trucks when it comes to carrying bicycles. The size, weight, and design of RVs require specialized solutions that can handle different demands.
Most RVs have limited rear clearance, meaning traditional hitch-mounted racks might block taillights, license plates, or access doors. Therefore, you need to consider how the rack positions your bikes relative to these critical components. Some RVs require racks that tilt or swing away to maintain access to storage compartments.
Weight distribution affects how your RV handles on the road. Adding significant weight to the rear can alter your vehicle’s balance and potentially exceed weight ratings. You must account for both the rack’s weight and the combined weight of all bikes you plan to carry.
Wind resistance increases dramatically when you add bikes to the exterior of your RV. This added resistance reduces fuel efficiency and can create handling challenges in crosswinds. Consequently, the rack’s design should minimize wind drag while keeping bikes secure.
Your RV’s construction materials also matter. Not all mounting surfaces can support the same weight or installation methods. Fiberglass, aluminum, and steel walls each require different mounting approaches and have varying load capacities.
Types of Bike Racks for Recreational Vehicles
Several distinct rack styles are available for RV use, each with advantages and limitations. Understanding these options helps you identify which type suits your specific situation.
Hitch-mounted racks attach to your RV’s trailer hitch receiver. They’re popular because they’re relatively easy to install and remove. These racks typically swing away from the vehicle, providing access to rear storage areas without removing bikes. However, they add considerable length to your vehicle and may require hitch extensions for proper clearance.
Bumper-mounted racks attach directly to your RV’s rear bumper. This option works well for smaller RVs without hitch receivers. Nevertheless, you must verify that your bumper can support the weight. Many RV bumpers are decorative rather than structural and cannot safely hold loaded bike racks.
Ladder-mounted racks utilize your RV’s existing rear ladder as a mounting point. They’re convenient because they use existing hardware and keep bikes elevated. On the other hand, not all ladders are rated for the additional weight of bikes and racks. Always check your ladder’s weight capacity before choosing this option.
Roof racks mount on top of your RV, keeping bikes completely out of the way. They don’t interfere with rear access or visibility. However, they create significant height challenges. Loading bikes onto an RV roof requires a ladder and considerable effort. Additionally, total height becomes a concern when entering campgrounds or passing under bridges.
A-frame tongue mounts work specifically for travel trailers, attaching to the trailer’s front A-frame. This location keeps weight forward and doesn’t block the towing vehicle’s rear access. Yet, this mounting position can interfere with propane tanks or battery compartments.
Evaluating Weight Capacity and Strength
One of the most critical factors in selecting any bike carrier is ensuring it can safely support your bikes’ weight. Underestimating weight requirements leads to dangerous failures and potential accidents.
Standard adult bicycles typically weigh between 25 and 35 pounds. Mountain bikes with full suspension often weigh 30 to 40 pounds. Electric bikes, which are increasingly popular, can weigh 50 to 70 pounds or more. Therefore, you need heavy duty racks if you’re transporting e-bikes or multiple heavy bicycles.
The rack’s weight capacity should exceed the combined weight of all bikes you’ll carry. Don’t assume a four-bike rack can safely hold four heavy mountain bikes just because it has four slots. Check the total weight limit and individual bike weight limits.
Moreover, consider the dynamic forces during travel. Bumps, turns, and sudden stops create forces greater than the static weight of your bikes. A quality rack accounts for these dynamic loads in its design and construction.
Material quality directly impacts strength and durability. Steel racks generally offer superior strength but add significant weight. Aluminum racks are lighter but may have lower weight capacities. Examine welds, joints, and connection points for quality construction.
Test ratings and certifications provide valuable information about a rack’s capabilities. Look for products that have undergone independent testing and meet industry safety standards. Manufacturer claims should be backed by actual test data.
Mounting Systems and Installation
The mounting system determines how securely your rack attaches to your RV and how easily you can install or remove it. Different systems suit different needs and skill levels.
Hitch receivers come in different sizes, with Class 2 and Class 3 being most common for RVs. A Class 2 hitch has a 1.25-inch receiver and is rated for lighter loads. Class 3 and 4 hitches have 2-inch receivers and handle heavier weights. Ensure your rack matches your hitch size and doesn’t exceed your hitch’s weight rating.
Anti-wobble systems reduce movement between the rack and hitch receiver. Excessive play causes the rack to sway and bounce, potentially damaging both the rack and your RV. Quality hitch-mounted racks include mechanisms to eliminate this play and keep everything stable.
Bumper mounting requires careful assessment of your specific bumper’s construction. Some RVs have reinforced bumpers designed to carry bikes, while others have purely cosmetic bumpers. Installation typically involves drilling holes, which becomes permanent even if you later remove the rack.
Ladder mounting systems should distribute weight across multiple ladder rungs. Concentrating weight on a single point can bend or break the ladder. Look for racks with adjustable straps that secure to several rungs simultaneously.
Tool-free installation appeals to many RV travelers who want to add or remove racks quickly. Some designs use hand-tightened knobs or lever systems instead of requiring wrenches. However, ensure these tool-free systems still provide secure, stable mounting.
Access and Convenience Features
RV bike racks must balance security with access to your vehicle. Thoughtful design features make living with your rack much more convenient.
Tilt-away mechanisms allow the entire rack to pivot down and away from your RV while bikes remain loaded. This feature is essential if your rack blocks access to storage compartments, generators, or LP tank access. The best tilt systems lock securely in both the upright and tilted positions.
Swing-out designs pivot horizontally to the side of your vehicle. They accomplish the same access goal as tilt-away racks but move differently. Consider which motion works better with your RV’s layout and the space available at your campsite.
Quick-release systems let you detach bikes rapidly without tools. Spring-loaded pins or lever mechanisms secure each bike but release with simple hand pressure. This convenience matters when you want to unload bikes quickly at each camping location.
Folding racks reduce profile when not carrying bikes. The arms fold up or in, minimizing the rack’s size during travel or storage. This feature helps if you leave the rack mounted between trips but don’t always carry bikes.
Locking mechanisms protect both the rack and your bikes from theft. Look for systems that lock the rack to your RV and also secure each bike to the rack. Integrated locks are more convenient than requiring separate padlocks.
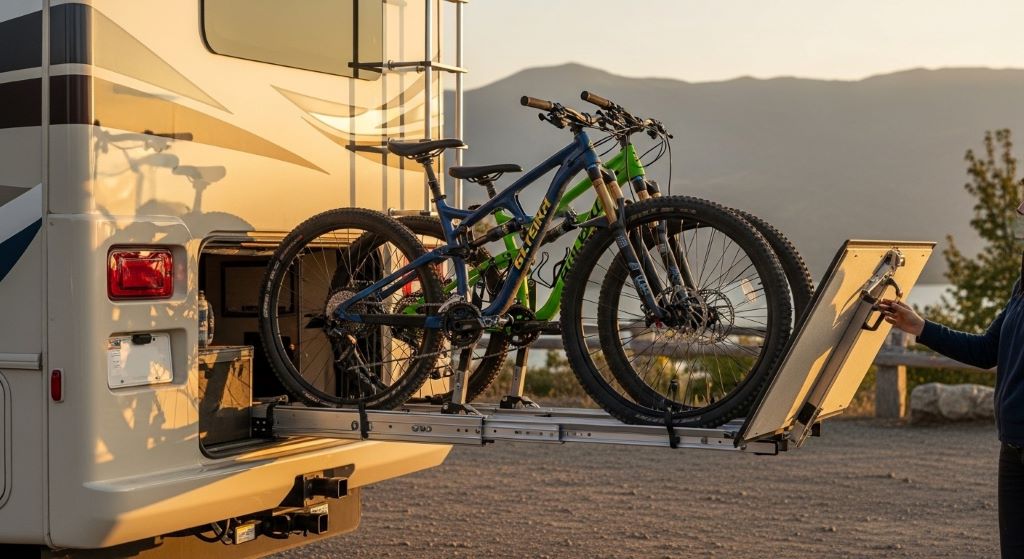
Protecting Your Bikes During Travel
Keeping your bikes safe and damage-free during highway travel requires more than just strapping them onto a rack. Proper protection preserves your investment and ensures your bikes are ready to ride when you arrive.
Frame contact points should be padded to prevent scratches and paint damage. Quality racks use rubberized cradles or thick padding wherever they contact your bike frames. Check that these protective materials are durable and weather-resistant.
Wheel retention systems prevent bikes from bouncing during travel. Some racks secure wheels with straps, while others use cradles or channels. The system should hold wheels firmly without allowing movement but shouldn’t damage spokes or rims.
Bike-to-bike contact causes the most damage during transport. Even slight movement allows handlebars, pedals, and derailleurs to clash with adjacent bikes. Look for racks that separate bikes adequately or include padding between bike positions.
Wind protection becomes important at highway speeds. Crosswinds and turbulence can shift bikes even when they’re strapped down. Some travelers use additional tie-downs or covers to minimize wind effects on exposed bikes.
Regular inspection during long trips helps catch problems before they become serious. Stop periodically to check that bikes remain secure and no straps have loosened. Vibration can gradually loosen even well-tightened connections.
Compatibility with Different Bike Styles
Not all bikes are created equal, and not all racks accommodate every bike style. Understanding compatibility issues prevents frustration and ensures safe transport.
Traditional diamond-frame bikes fit most racks without issues. These standard designs with top tubes parallel to the ground work with conventional cradle and arm systems. Most rack capacities and measurements assume this standard frame geometry.
Step-through frames, common on comfort bikes and some women’s models, lack a traditional top tube. Many standard racks can’t secure these frames properly. Look for racks with adjustable arms or alternative securing methods that don’t rely on a horizontal top tube.
Fat tire bikes have oversized tires that may not fit standard wheel channels or trays. The extra width can also cause spacing issues when loading multiple bikes. Verify that any rack you consider can accommodate fat tire widths, typically 4 to 5 inches.
Children’s bikes present size challenges. Their smaller frames and wheels may not fit cradles designed for adult bikes. Some racks include adapters for smaller bikes, while others simply can’t accommodate them safely.
Electric bikes deserve special mention due to their weight and often unusual frame designs. Many standard motorhome racks cannot safely carry e-bikes. Verify weight capacity and frame compatibility specifically for electric bikes if you plan to transport them.
Full suspension mountain bikes have frame designs that may interfere with some rack styles. The rear shock and linkage can complicate where and how the bike contacts the rack. Additionally, these bikes tend to be heavier, requiring robust mounting systems.
Legal and Safety Considerations
Operating an RV with bikes mounted on the exterior involves legal requirements and safety responsibilities. Ignoring these factors can result in tickets, accidents, or liability issues.
License plate visibility is legally required in all states. Your bike rack cannot completely obscure your license plate. Some racks include license plate brackets that relocate the plate to remain visible. Others require you to purchase separate plate relocators.
Lighting requirements also apply to loads extending beyond your vehicle. If bikes extend significantly past your rear bumper, you may need additional lighting. Red reflectors, marker lights, or even a light bar might be necessary depending on your state’s laws and how far bikes protrude.
Width restrictions vary by state but generally limit total vehicle width to 8 to 8.5 feet. Handlebars extending sideways can exceed these limits. Position bikes carefully and consider removing pedals if necessary to stay within legal width limits.
Height awareness becomes crucial if you mount bikes on your roof. Know your total height and watch for low bridges, tree branches, and campground entrance gates. Many RV accidents occur when drivers forget about their increased height.
Insurance considerations should factor into your decision. Some insurance policies have specific requirements for properly securing loads. Additionally, inadequate securing methods that result in bike loss or damage to other vehicles may not be covered.
Maintenance and Longevity
Investing in a quality bike rack represents a significant expense. Proper maintenance extends its life and ensures it continues performing safely.
Corrosion prevention starts with choosing racks with appropriate finish materials. Powder coating provides excellent protection against rust. Stainless steel hardware resists corrosion better than standard steel. If you camp near saltwater, corrosion resistance becomes even more critical.
Regular cleaning removes road grime, salt, and dirt that accelerate wear. Wash your rack whenever you wash your RV. Pay special attention to moving parts, hinges, and locking mechanisms where grit accumulates.
Lubrication of moving parts keeps tilt, swing, and folding mechanisms operating smoothly. Use appropriate lubricants that won’t attract excessive dirt. Apply lubricant to pivot points, springs, and lock cylinders regularly.
Strap replacement should occur when you notice fraying, cracking, or loss of elasticity. Straps and bungees degrade from UV exposure and stretching. Replacing them before they fail prevents bike damage or loss.
Storage when not in use protects your rack from unnecessary weathering. If you remove the rack between trips, store it indoors or cover it if outdoor storage is necessary. This practice significantly extends component life.
Inspection before each trip takes just minutes but can prevent serious problems. Check all bolts, pins, and fasteners for tightness. Examine straps and padding for wear. Test locking mechanisms and moving parts to ensure they function properly.
Budget Considerations and Value
Bike racks for RVs range from under one hundred dollars to over a thousand. Understanding what drives these price differences helps you find the best value for your needs.
Entry-level racks typically use lighter materials, simpler designs, and fewer features. They may adequately serve occasional users who transport lightweight bikes short distances. However, they often lack durability for frequent use or heavy loads.
Mid-range options balance cost with quality and features. They usually include conveniences like tilt-away access, better padding, and more robust construction. This price range offers the best value for most RV travelers who use their racks regularly.
Premium racks deliver maximum capacity, superior materials, extensive features, and excellent warranties. Professional-grade construction ensures years of trouble-free use. For full-time RVers or those transporting expensive bikes, this investment makes sense.
Total cost of ownership includes more than the initial purchase price. Consider installation costs if you need professional help. Factor in potential accessories like locks, light boards, or hitch extensions. Account for replacement parts over time.
Warranty coverage provides insight into manufacturer confidence and your protection against defects. Better warranties typically indicate better products. Read warranty terms carefully to understand what’s covered and for how long.
Resale value can offset initial costs if you later upgrade or sell your RV. Quality racks from reputable brands retain value better than cheap alternatives. Well-maintained premium racks can recover significant portions of their original cost.
Making Your Final Decision
After researching options and understanding your requirements, you’re ready to make an informed choice. A systematic approach ensures you select the right rack for your specific situation.
Create a checklist of must-have features based on your RV type, bike styles, and travel habits. Distinguish between essential requirements and nice-to-have options. This clarity prevents you from being swayed by impressive features you don’t actually need.
Read verified customer reviews from other RV owners. Pay attention to reviews mentioning long-term use and potential problems that emerged after initial installation. Real-world experiences reveal issues that manufacturer descriptions don’t mention.
Compare warranties, return policies, and customer service reputations. A slightly more expensive rack from a company with excellent support may prove more valuable than a cheaper option from a company that’s difficult to contact.
Consider trying before buying if possible. Some RV dealers have floor models you can examine closely. RV shows provide opportunities to see multiple options side by side. Fellow campers at RV parks often happily share their experiences with their equipment.
Think about future needs, not just current requirements. Will you upgrade to e-bikes? Might you add bikes as your family grows? Choosing a rack with some extra capacity prevents needing to replace it soon.
Conclusion
Selecting the best bike rack for RV travel requires careful consideration of your vehicle’s design, your bikes’ specifications, and your travel style. Understanding the different types of RV bike racks available helps you identify which mounting system works best for your situation. Whether you choose hitch-mounted, bumper-mounted, or ladder-mounted options, ensuring adequate weight capacity and proper installation keeps your bikes secure.
Heavy duty racks are essential if you transport electric bikes or multiple heavy bicycles. Pay attention to frame compatibility, access features, and legal requirements when making your selection. Quality construction, protective padding, and convenient features like tilt-away access significantly improve your experience with motorhome racks.
Proper maintenance extends your rack’s life and ensures continued safe operation. Regular cleaning, lubrication, and inspection prevent problems before they occur. While premium racks cost more initially, they often provide better value through superior durability and features.
Take time to research thoroughly, read reviews, and verify that any rack you consider meets your specific needs. The right bike rack transforms your RV adventures by making bicycle exploration convenient and worry-free. Your investment in quality equipment pays dividends through years of reliable service and countless miles of cycling adventures at your favorite destinations.
Frequently Asked Questions
Can I use a regular car bike rack on my RV?
Most standard car bike racks are not suitable for RVs. Recreational vehicles require racks specifically designed for their size, weight, and access requirements. Car racks typically cannot swing away or tilt for rear access, which is essential for most RVs. Additionally, the mounting systems on car racks may not be compatible with RV bumpers or hitches. Always choose racks specifically rated and designed for RV use to ensure safety and functionality.
How many bikes can I safely carry on my RV?
The number of bikes you can safely carry depends on your rack’s weight capacity and your RV’s weight ratings. Most RV bike racks accommodate two to four bikes. However, you must calculate the total weight of all bikes plus the rack itself and ensure this doesn’t exceed the rack’s maximum capacity or your RV’s rear weight limit. Electric bikes significantly reduce how many bikes you can carry due to their heavier weight.
Do I need a special hitch for a bike rack?
You need a hitch receiver that matches your rack’s mounting size and has adequate weight capacity. Most RV bike racks require a Class 3 hitch with a 2-inch receiver, though some work with Class 2 hitches. Check your hitch’s weight rating to ensure it can support the combined weight of the rack and bikes. If your RV doesn’t have a hitch or has an undersized one, you’ll need to install or upgrade it before using a hitch-mounted rack.
Will a bike rack affect my RV’s fuel economy?
Yes, adding bikes to the exterior of your RV increases wind resistance and weight, both of which reduce fuel efficiency. The impact varies based on bike size, number of bikes, and travel speed. Typically, you can expect a reduction of 5 to 15 percent in fuel economy when carrying bikes. Positioning bikes to minimize wind resistance and removing them when not needed helps reduce this impact.
How do I prevent my bikes from being stolen while traveling?
Use a bike rack with integrated locking systems that secure both the rack to your RV and each bike to the rack. Cable locks or U-locks provide additional security. Park in well-lit areas and, when possible, choose campsites where you can see your RV from your campsite. Consider bringing bikes inside your RV overnight in areas where theft is a concern. Some travelers also use bike covers, which hide the bikes and make them less attractive targets.
Related Topics:
How to Pick an Indoor Stationary Bike Trainer Stand for Small Spaces
What is a hybrid bike good for?