

A frame is the one component you cannot upgrade without buying an entirely new bike — every other part bolts on and off, but the frame defines your riding experience for the entire lifespan of the bicycle. Two riders on identical components will have completely different experiences if one rides a slack aggressive frame and the other rides a steep cross-country frame, even on the same trail at the same speed. Mountain bike frame durability and geometry are the foundation that determines whether a bike feels confident on descents, efficient on climbs, playful in corners, or stable at speed. This mountain bike buying guide focuses on the decision that matters most and lasts longest: choosing a frame material, geometry, and style that matches how you actually ride rather than how marketing tells you to ride.
What Frame Materials Are Available and How Do They Differ?
Three frame materials dominate mountain biking: aluminum alloy (lightweight, affordable, stiff), chromoly steel (durable, comfortable, heavier), and carbon fiber (lightest, most expensive, excellent vibration damping) — each offering distinct ride characteristics that suit different riding priorities and budgets.
| Material | Weight | Durability | Ride Feel | Repairability | Price Range |
|---|---|---|---|---|---|
| Aluminum (6061/7005) | Medium (4–5 lbs frame) | High — resists dents, fatigue over time | Stiff, responsive, can feel harsh | Difficult — welding weakens heat-treated alloy | $300–$2,000 complete |
| Chromoly Steel (4130) | Heavy (5–7 lbs frame) | Highest — dents rather than cracks, repairable | Compliant, smooth, absorbs vibration | Excellent — any welder can repair | $500–$2,500 complete |
| Carbon Fiber | Lightest (2.5–4 lbs frame) | Moderate — strong in designed load paths, fragile to impacts | Tunable — stiff where needed, compliant elsewhere | Specialist repair only, expensive | $1,500–$10,000+ complete |
For most recreational and everyday riders, aluminum delivers the best combination of low weight, durability, affordability, and wide availability. Steel suits riders who value ride comfort over weight savings and want lifetime repairability. Carbon suits competitive riders and weight-obsessed enthusiasts willing to pay 2–5x more for 1–2 lbs of weight savings.
How Does Frame Geometry Affect Your Riding Experience?
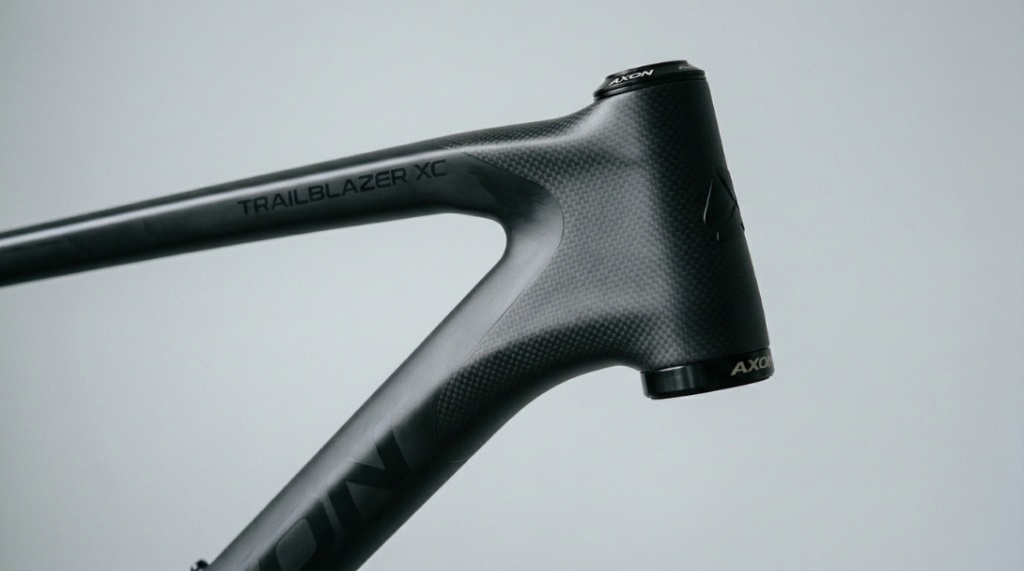
Frame geometry — specifically head tube angle, seat tube angle, reach, and chainstay length — determines whether your bike feels stable or agile, climbs efficiently or descends confidently, and corners predictably or playfully. Geometry affects riding feel more than component quality or frame material.
Key geometry numbers explained:
- Head tube angle (HTA): Measured from horizontal. Slacker (64–67°) = more stable at speed, better descending confidence, slower steering. Steeper (68–71°) = quicker steering, better climbing, less stable at high speed. Trail bikes: 66–68° is the modern sweet spot.
- Seat tube angle (STA): Steeper (74–76°) puts you forward over the pedals for efficient climbing. Slacker (71–73°) positions you rearward — less efficient climbing but more rearward weight for descending.
- Reach: Horizontal distance from bottom bracket to head tube. Longer reach = stretched-out, stable, confident position. Shorter reach = upright, maneuverable, compact feel. Match to your arm length and riding preference.
- Chainstay length: Distance from bottom bracket to rear axle. Shorter (420–435mm) = playful rear end, easy wheelies, quick direction changes. Longer (440–460mm) = stable rear, better climbing traction, less playful.
- Wheelbase: Total distance front axle to rear axle. Longer = more stable at speed. Shorter = more agile at slow speed. Sum of reach, head tube angle, and chainstay length effects.
Which Geometry Matches Your Riding Style?
Match geometry to your primary riding by identifying where you spend 70%+ of your trail time: climbing-focused riders need steeper geometry, descending-focused riders need slacker geometry, and all-around trail riders need the modern moderate geometry that balances both without excelling at either extreme.
- Climbing/XC focused (you ride for fitness and speed):
- Head tube: 68–70°
- Seat tube: 74–76°
- Chainstays: short (420–430mm)
- Result: efficient power transfer, responsive steering, lightweight priority
- All-around trail (you ride everything moderately):
- Head tube: 66–68°
- Seat tube: 74–76°
- Chainstays: moderate (430–445mm)
- Result: balanced climbing/descending, versatile handling, confidence in varied terrain
- Aggressive/enduro (you prioritize descending fun):
- Head tube: 63–66°
- Seat tube: 76–78°
- Chainstays: moderate-long (435–460mm)
- Result: supreme descending confidence, stable at speed, requires more effort climbing
- Everyday/mixed-use (you commute and do light trails):
- Head tube: 68–70°
- Seat tube: 73–75°
- Chainstays: short-moderate (425–440mm)
- Result: comfortable upright position, efficient pedaling, adequate trail handling
How Do You Evaluate Frame Durability Before Buying?
Evaluate frame durability through: weld quality inspection (consistent beads without voids), tubing gauge/thickness (thicker walls at stress points), dropout design (replaceable derailleur hanger indicates thoughtful design), paint quality (thicker powder coat resists chips better), and manufacturer warranty length (lifetime frame warranty indicates manufacturer confidence).
- Weld inspection: Look at every weld joint closely. Quality welds are consistent in width, evenly rippled, and fully penetrate the joint without gaps, undercuts, or splatter. Inconsistent or blobby welds indicate rushed manufacturing with potential fatigue points.
- Tubing at stress points: Areas where tubes meet (head tube junction, seat tube/top tube junction, bottom bracket shell) should show reinforcement — gussets, thicker tubing, or butted construction that places more material where stress concentrates.
- Replaceable derailleur hanger: A small sacrificial aluminum piece that breaks before the frame does during rear derailleur impacts. Frames without replaceable hangers risk frame damage from a simple trail mishap. Replacement hangers cost $15–$25 versus $hundreds for frame repair.
- Paint/coating: Thicker powder coat or anodized finishes resist trail damage (rock strikes, branch scratches, rack contact) better than thin paint that chips to bare metal within weeks of trail riding.
- Warranty: Lifetime frame warranty = manufacturer confidence in durability. 2–5 year warranty = standard. No warranty stated = avoid.
The BrightPeak mountain bike frame represents the affordable durability category — aluminum construction with adequate tubing for everyday trail abuse at a price point accessible to riders who need reliability without premium pricing.
Should You Choose Hardtail or Full-Suspension Frame?
Hardtail frames (no rear suspension) offer: lighter weight, lower cost, less maintenance, better climbing efficiency, and more direct power transfer — making them the better frame choice for 70% of recreational riders whose trails do not demand the rough-terrain comfort that full-suspension provides at 2–3x the price.
- Choose hardtail when: Budget is under $1,500, your trails are moderate (not sustained rough rock gardens), you value climbing efficiency, you prefer simple low-maintenance bikes, or you are still developing riding skills (hardtails teach better technique).
- Choose full-suspension when: Budget exceeds $1,500 (below this, full-suspension quality is inadequate), you ride genuinely rough terrain regularly, you prioritize descending comfort over climbing efficiency, or you have joint issues that benefit from reduced vibration.
The common mistake: buying cheap full-suspension ($500–$800) thinking rear suspension helps. Budget rear shocks are heavy, poorly damped, and flex under pedaling — making the bike slower uphill AND less controlled downhill compared to a similarly-priced hardtail with better fork and components. Full-suspension only benefits riders when the rear shock is quality — which starts around $1,200–$1,500 for complete bikes.
How Do You Size a Mountain Bike Frame Correctly?
Size a mountain bike frame using reach and stack measurements matched to your body proportions (arm length, torso length, leg inseam) rather than relying solely on manufacturer size labels (S/M/L) which vary between brands — a “Medium” from one brand may match a “Large” from another.
Sizing process:
- Step 1 — Standover clearance: Straddle the frame with feet flat. Minimum 2–3 inches between top tube and body for trail bikes (you dismount over rough terrain). If clearance is less, size down.
- Step 2 — Reach check: Sit on the saddle at proper height, hands on grips. Elbows should have a comfortable 15–20° bend. Fully straight arms = frame too large. Excessively bent arms = frame too small.
- Step 3 — Saddle-to-bar relationship: Bars should be level with or 1–2 inches above the saddle for trail comfort. If you cannot achieve this with available stem/spacer adjustment, the frame size may be wrong.
- Step 4 — Knee clearance: While pedaling, your knees should not contact the handlebars on tight turns. If they do, the frame is too small or the cockpit too short.
When between sizes: for trail riding, size down (smaller frames are more maneuverable and playful). For touring/commuting, size up (larger frames are more stable and comfortable at sustained pace).
Conclusion
The perfect mountain bike frame matches three factors to your riding style: material that balances your weight/durability/budget priorities (aluminum for most riders), geometry that reflects where you spend 70%+ of trail time (modern moderate for versatility), and sizing that provides proper reach and standover for your body. The frame outlasts every other component on the bike — it is the one decision worth getting right the first time because it cannot be upgraded without buying an entirely new bicycle.
Focus on geometry numbers rather than marketing terms. A frame described as “aggressive” or “playful” means nothing without knowing the head tube angle and reach that produce those characteristics. Learn to read geometry charts, compare the numbers that match your riding style, and choose the frame that puts you in the right position for the trails you actually ride — not the trails marketing assumes you want.
What frame characteristic matters most for your riding — geometry, material, or weight? Share what influenced your frame choice below.
Finding the right frame geometry is essential for traditional trail riding, but if you want to tackle rugged terrains with an extra power boost, exploring motorized options can completely transform your experience. If you are curious about how modern power integration handles out on the trails, check out our comprehensive HOVERFLY Electric Bike Review to see how it stacks up against standard setups.
Frequently Asked Questions
How long does an aluminum mountain bike frame last?
Quality aluminum frames last 10–20+ years of recreational riding. Aluminum eventually fatigues (unlike steel which theoretically lasts forever), but modern heat-treated alloys handle decades of normal trail use. Frames fail from crash damage or manufacturing defects far more often than from fatigue during recreational riding. Inspect annually for cracks at weld joints.
Is steel better than aluminum for mountain bike frames?
Neither is objectively better — they serve different priorities. Steel is more durable (dents rather than cracks), more comfortable (natural vibration damping), and repairable anywhere. Aluminum is lighter (1–2 lbs), stiffer (more responsive), and cheaper for equivalent performance. Choose steel for comfort and longevity; aluminum for weight and value.
Does frame geometry really matter for casual riders?
Yes — even casual riders feel the difference between a 67° and 70° head tube angle. Slacker angles provide confidence on any downhill. Steeper angles feel easier to pedal uphill. Casual riders benefit most from moderate geometry (67–68° HTA) that provides balanced performance without requiring aggressive riding to feel natural.
Can I change my bike’s geometry without a new frame?
Limited changes are possible: angle-adjusting headset cups (±1° head angle), different fork travel (changes head angle 0.5–1° per 10mm), and stem length/angle changes (affect reach and stack). However, these are fine-tuning adjustments — fundamental geometry mismatches (wrong head angle by 3°+) cannot be corrected without a different frame.
Should beginners prioritize frame quality over components?
Yes — buy the best frame your budget allows and accept entry-level components. Components upgrade easily as budget allows and as parts wear. The frame stays forever. A $600 bike with excellent frame and basic components has a better upgrade path than a $600 bike with a mediocre frame and slightly better components that cannot overcome frame limitations.
What is the most important frame measurement for comfort?
Stack height (vertical distance from bottom bracket to head tube top) most directly affects riding comfort. Higher stack = more upright position = less back/neck strain. Frames with taller stack heights accommodate comfort-seekers without requiring extreme stem risers or handlebar swaps. Check stack before reach when comfort is your priority.