

Practicing your golf swing at home offers tremendous benefits for improving your game. However, many golfers assume they need a large property to set up practice equipment. The truth is that even compact yards can accommodate a practice setup with proper planning and installation techniques.
Installing an outdoor golf net in a limited space requires careful consideration of safety, positioning, and structural support. You need to protect your property, your neighbors, and anyone who might be nearby during practice sessions. Additionally, you want to create a setup that actually helps your game rather than encouraging bad habits.
This comprehensive guide walks you through every step of installing a practice net safely in a small yard. You’ll learn how to assess your space, choose the right equipment, secure everything properly, and create a functional practice area that fits your available room. By following these guidelines, you can transform even a modest backyard into an effective training facility.
Assessing Your Available Space
Before purchasing any equipment, you need to thoroughly evaluate your yard. Understanding your space limitations helps you make smart choices about equipment size and placement.
Start by measuring the area where you plan to practice. You’ll need enough room for your swing plus adequate clearance on all sides. A minimum of 10 feet wide and 8 feet deep provides basic functionality, though more space is always better.
Consider the height of your swing as well. Golfers with taller stature or those practicing with drivers need more vertical clearance. Measure from the ground to any overhead obstacles like tree branches, power lines, or eaves. You’ll want at least 12 feet of clear height for comfortable practice.
Look at what surrounds your potential practice area. Windows, parked cars, outdoor furniture, and landscaping all need protection from errant shots. Even with a net, occasional misses happen during setup or when a ball bounces unexpectedly.
Ground surface matters more than many people realize. Flat, level ground provides the most stable foundation for your setup. Sloped areas can work but require additional securing methods and may affect your practice quality.
Check local regulations and homeowner association rules before proceeding. Some neighborhoods have restrictions on recreational equipment or structures in yards. Additionally, verify that your installation won’t violate any building codes, especially if you plan to create a permanent structure.
Choosing the Right Golf Hitting Net for Yard Installations
The market offers numerous options, and selecting appropriate equipment for your space is crucial. Not all nets are created equal, particularly when working with limited areas.
Size considerations start with matching the net dimensions to your available space. Compact models designed specifically for small yards typically measure 7 to 10 feet wide. These provide adequate target area while fitting in tighter spaces. Remember that you need clearance around the net, not just space for the net itself.
Durability determines how long your investment will last. Look for nets made from heavy-duty nylon with reinforced stitching at stress points. The material should handle repeated impacts from golf balls traveling at high speeds without tearing or developing holes.
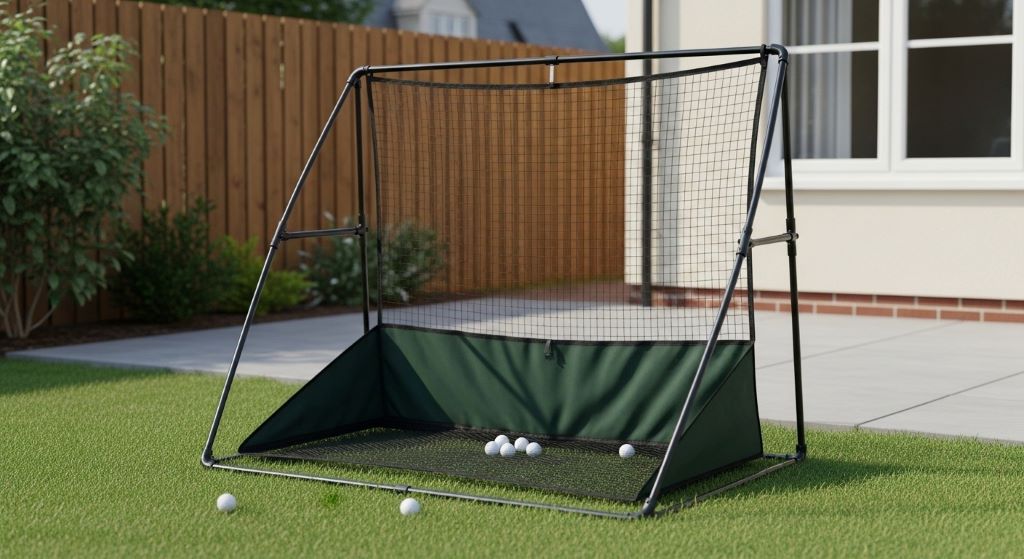
Frame construction affects both stability and portability. Steel frames offer superior strength and stability but weigh more. Fiberglass poles provide a good balance between strength and weight. Some designs use tension systems with poles and stakes rather than traditional frames.
Target systems integrated into the net help you focus on accuracy rather than just hitting balls. Multiple target zones encourage you to work on shot shaping and precise aim. This feature becomes especially valuable in small spaces where you’re maximizing limited practice opportunities.
Portability might be important if you need to move or store your net regularly. Freestanding designs that fold or collapse make this easier. However, truly stable installations often require more permanent mounting, creating a trade-off between convenience and security.
Preparing Your Installation Area
Proper preparation creates a safer, more effective practice space and makes the actual installation process much smoother.
Clear the area completely before beginning installation. Remove any furniture, decorations, toys, or other items from the practice zone and surrounding area. This includes the space behind you where you’ll be swinging.
Level the ground if necessary. Minor slopes can be addressed with leveling equipment or by building up low spots. Significant slopes might require professional grading or the creation of a level platform.
Consider installing a hitting mat or turf area. This protects your natural grass from wear and provides a consistent surface for practice. Quality hitting mats also feel more like real course conditions than hitting off bare ground or damaged grass.
Mark your planned net location clearly. Use stakes and string to outline where the frame will sit. This visual guide helps you verify positioning before committing to the installation.
Add a backstop behind your net for extra protection. Even quality nets occasionally let balls through, especially if they’re worn or if a ball hits a seam. A fence, wall, or additional barrier provides a crucial second line of defense.
Think about ball containment beyond just the net. Side netting or barriers prevent balls from rolling into unwanted areas if they miss the main net. This consideration becomes particularly important in small spaces where balls can quickly reach property boundaries.
Securing the Net Frame Properly
A properly secured frame ensures safety and extends the life of your equipment. Inadequate securing is the most common installation mistake in small spaces.
Ground stakes work well for semi-permanent installations. Drive stakes at a 45-degree angle away from the net for maximum holding power. The angle creates resistance against the forces that try to pull the net forward when balls hit it.
Concrete footings provide the most secure foundation for permanent installations. Dig holes at each frame leg position, insert the legs, and fill with concrete. This method works best if you’re certain about the location and don’t plan to move the net.
Sandbags or weight bags offer portable stability options. Place them on frame feet or base bars to add mass that resists movement. This approach works well for freestanding designs that you might want to relocate or store seasonally.
Guy wires or tension cables add stability to taller nets. Run cables from the top of the frame to ground anchors positioned away from the net. This triangulation prevents the frame from tipping backward or sideways during use.
Regular maintenance checks ensure your securing system remains effective. Inspect ground stakes periodically to verify they haven’t loosened. Check concrete footings for cracks. Examine guy wires for proper tension and signs of wear.
Consider wind exposure in your area. Small spaces between buildings can create wind tunnels that put extra stress on your net. Additional securing may be necessary in windy locations to prevent damage or the entire structure from tipping.
Creating Safe Impact Zones
Beyond the net itself, thoughtful planning of impact zones protects your property and creates a better practice environment.
Position the net away from windows and glass doors. Even though the net should catch everything, maintaining distance from breakable items adds an essential safety margin. A minimum of 15 feet provides reasonable protection for most installations.
Angle the net slightly if your space allows. A net positioned perpendicular to your hitting direction works fine, but angling it 10 to 15 degrees helps direct bounced balls toward safe areas rather than back at you.
Add side barriers if you’re practicing parallel to property lines or near areas where people walk. Simple barrier netting or fencing prevents errant shots from leaving your practice area.
Create a designated standing area for your practice sessions. Mark this zone clearly so family members know where you’ll be positioned. This helps prevent anyone from accidentally walking into your swing path.
Install warning signs if your yard connects to shared spaces or if neighbors’ children play nearby. Clear communication about when you’re practicing prevents surprise encounters and potential accidents.
Think about ball retrieval logistics in your small space. Include a collection system or designated ball storage that keeps your practice area organized and prevents tripping hazards.
Protecting Surrounding Structures and Landscaping
Small yards often mean practicing closer to homes, fences, and gardens than ideal. Strategic protection prevents costly damage.
Hang protective padding or blankets on nearby walls or fences. Heavy moving blankets work well for this purpose. Secure them firmly so they don’t blow away or slide down during use.
Build or purchase barrier screens for areas that can’t be moved. These portable walls can be positioned to protect specific vulnerable spots. Some golfers use old mattresses or thick foam panels as temporary barriers.
Trim or protect nearby plants before starting regular practice. Golf balls can damage shrubs, flowers, and small trees. Moving potted plants or installing temporary fencing around garden areas prevents heartbreaking landscape damage.
Consider the ricochet potential of hard surfaces. Balls that hit pavement, walls, or fencing can bounce unpredictably. Position your setup to minimize these risks or add padding to potential ricochet surfaces.
Protect outdoor equipment and furniture by moving them or covering them during practice. Grills, patio furniture, and garden decorations should be well outside your practice area or shielded by barriers.
Watch for underground utilities before driving stakes or digging footings. Call your local utility locating service before doing any ground penetration. Hitting a buried cable or pipe creates serious safety hazards and expensive repairs.
Installing Proper Lighting for Safe Practice
Good lighting extends your practice time and prevents accidents in small spaces where visibility is crucial.
Overhead lighting provides the most natural illumination. Position lights to minimize shadows on your hitting area and the net. LED floodlights offer bright, energy-efficient illumination suitable for evening practice.
Avoid lights that shine directly in your eyes during your stance or swing. Position fixtures to illuminate the target area without creating glare. Test the lighting from your practice position before finalizing placement.
Motion-activated lights offer convenience and energy savings. They illuminate your practice area automatically when you approach and turn off after you finish, eliminating the need to manually control lighting.
Consider your neighbors when installing practice lighting. Bright lights aimed toward neighboring properties create nuisance and strain relationships. Use directional lighting or shields to keep illumination in your yard.
Battery-powered lights provide flexibility for temporary setups. These portable solutions work well if you don’t want to run electrical wiring or if you occasionally practice in different areas of your yard.
Backup lighting ensures safety if your primary lights fail. Having a secondary light source prevents you from being stranded in darkness mid-practice, which could lead to tripping hazards or difficulty navigating your small space safely.
Setting Up Practice Routines in Limited Space
Once installed, maximizing your small practice area requires thoughtful routines and realistic expectations.
Start every session with a visual inspection. Check that the net is secure, the area is clear, and no new hazards have appeared since your last practice. This habit takes seconds but prevents most accidents.
Use a limited number of balls for practice in small spaces. Having 10 to 15 balls is sufficient. This quantity keeps sessions focused and makes ball collection manageable. More balls often lead to rushed swings and cluttered practice areas.
Practice club selection strategically. Start with shorter clubs to ensure your setup is secure and everything functions properly. Progress to longer clubs only after verifying that balls are caught consistently.
Develop a consistent pre-shot routine that includes checking behind you. In small spaces, someone might enter your yard without you noticing. A quick look prevents dangerous situations.
Focus on specific aspects of your swing rather than just hitting balls repeatedly. Work on your takeaway, position at the top, or follow-through. Quality practice beats quantity, especially in limited spaces where perfect repetition builds better habits.
Set achievable goals for each practice session. Target work, tempo development, or feel drills all work well in small spaces. Trying to practice everything at once reduces effectiveness and increases frustration.
Maintaining Your Installation Over Time
Regular maintenance keeps your practice net safe and functional for years.
Inspect the netting monthly for holes, tears, or loose areas. Small damage can be repaired immediately with heavy-duty thread or net repair patches. Addressing problems early prevents them from spreading.
Check all connection points where the net attaches to the frame. These junctions experience constant stress and can weaken over time. Retighten or replace worn attachments before they fail.
Clean the net occasionally to remove dirt, pollen, and debris. Most nets can be rinsed with a garden hose. Proper cleaning prevents material degradation and maintains visibility of target zones.
Verify that securing systems remain tight and functional. Stakes can work loose, especially after rain or freeze-thaw cycles. Sandbags may need refilling. Guy wires require tension adjustments.
Store removable nets during harsh weather if possible. While quality nets handle outdoor conditions, bringing them in during extreme cold, heavy snow, or violent storms extends their lifespan significantly.
Replace worn components promptly rather than attempting to work around them. A torn net or bent frame creates safety hazards. Quality replacement parts cost far less than property damage or injuries.
Dealing with Common Small Space Challenges
Limited areas create unique challenges that require creative solutions.
Noise from ball impacts can bother neighbors, especially in densely populated areas. Adding foam padding behind the net or using quieter practice balls reduces sound. Practice during reasonable hours and communicate with neighbors about your schedule.
Ball collection in cramped quarters becomes tedious without a system. Use a bucket or basket positioned strategically for easy collection. Some golfers attach collection bags to their nets to automatically gather balls.
Limited club selection might be necessary in very tight spaces. Focusing practice on irons and wedges rather than drivers often makes more sense in small yards. This limitation doesn’t significantly impact skill development for most golfers.
Weather exposure can’t be avoided in small yards where moving the setup isn’t practical. Choose weather-resistant equipment and accept that you’ll need to skip practice during severe conditions.
Shared yard usage requires coordination with family members. Establish clear practice times and communicate when the area is off-limits. Create visual signals like flags or signs to indicate when the practice zone is active.
Storage constraints in small yards demand creative solutions. Folding nets or designs that disassemble easily work better than permanent structures when storage space is premium.
Conclusion
Installing an outdoor golf net safely in a small space is entirely achievable with proper planning and execution. The key lies in thoroughly assessing your available area, choosing equipment that fits your specific constraints, and implementing comprehensive safety measures.
Proper securing of your golf hitting net for yard installations ensures stability and longevity. Taking time to prepare the installation area, protect surrounding structures, and create safe impact zones prevents accidents and property damage. Additionally, good lighting and thoughtful practice routines maximize the value you get from your limited space.
Regular maintenance keeps your setup functioning safely over time. Address wear and tear promptly, inspect securing systems regularly, and replace components before they fail. These simple habits protect your investment and ensure years of productive practice.
Remember that even a small practice area offers tremendous value for game improvement. Consistent, focused practice in your backyard beats infrequent trips to the driving range for most golfers. By following the guidelines in this article, you can create a safe, effective practice space regardless of your yard’s size.
Frequently Asked Questions
How much space do I really need for a backyard golf net?
A minimum of 10 feet wide, 8 feet deep, and 12 feet high provides basic functionality for iron practice. However, you should add 3 to 4 feet of clearance on all sides for safety. Driver practice requires more space, ideally 12 feet wide and 10 feet deep. Measure your available area carefully and choose net dimensions that fit comfortably within these clearances.
Can I install a golf net on a sloped yard?
Yes, you can install a net on a slope, but it requires additional securing and may affect your practice quality. Build a level platform for your hitting mat to maintain proper stance and swing mechanics. The net itself can follow the slope if necessary, but ensure it’s securely anchored with extra stakes or guy wires. Steep slopes may need professional leveling for safe, effective practice.
How do I prevent balls from damaging my house or windows?
Position your net at least 15 feet from windows and glass doors. Add a solid backstop behind the net like a fence or wall as a second barrier. Hang protective padding on nearby structures using moving blankets or foam panels. Angle the net slightly to direct balls away from vulnerable areas. Finally, start each practice session with a few gentle shots to verify everything is working properly.
What should I do if my neighbors complain about the noise?
Communicate proactively with neighbors about your practice schedule. Practice during reasonable hours, typically between 9 AM and 7 PM on weekdays. Add foam padding or rubber mats behind your net to dampen impact sounds. Consider using foam practice balls which are much quieter than regular golf balls. Most neighbors are understanding when you’re considerate about timing and noise levels.
How long does a typical outdoor golf net last with regular use?
Quality outdoor golf nets typically last 3 to 5 years with regular use and proper maintenance. Factors affecting lifespan include material quality, weather exposure, frequency of use, and maintenance habits. Nets stored during harsh weather last longer than those left up year-round. Regular inspections and prompt repairs of small damage can extend a net’s useful life significantly. Budget models may need replacement after 1 to 2 years.
Related Topics:
How to become a fitness trainer?
What is the Full Scholarship Program for International Students?