

Customizing golf clubs through stamping is an exciting way to personalize your equipment, adding a unique touch that reflects your style or personality. Whether you’re marking your initials, a meaningful date, or a custom design, stamping golf clubs at home can be a rewarding DIY project. This article explores the step-by-step process of custom golf club stamping, offering practical tips to achieve professional results. For those looking to elevate their game with vintage-inspired equipment, resources like The HickoryGolf Hub provide valuable insights into golf club customization and maintenance.
Understanding Golf Club Stamping
Golf club stamping involves imprinting designs, letters, or numbers onto the metal surface of a clubhead, typically on irons or wedges. This process enhances aesthetics and can make your clubs easily identifiable. Before starting, it’s essential to understand the materials and tools required. Most golf clubheads are made of soft metals like carbon steel or stainless steel, which are ideal for stamping. However, harder materials like titanium may require professional equipment. Therefore, confirm your club’s material by checking the manufacturer’s specifications.
For those preparing to stamp their clubs, you may need to remove the shaft to access the clubhead more easily. Learning how to remove shaft from golf club is a critical step, as it ensures a stable working surface and prevents damage to the shaft or grip. The Hickory Golf Hub offers a detailed guide on this process, making it accessible even for beginners. Once the clubhead is separated, you’re ready to begin stamping.
Tools and Materials Needed
To stamp golf clubs at home, gather the following tools and materials to ensure precision and safety:
- Metal stamps: Choose high-quality letter, number, or design stamps (1/8-inch or 1/4-inch sizes work well for most clubheads).
- Stamping block: A solid steel or anvil block to absorb impact and prevent surface damage.
- Hammer: A 1-2 lb. ball-peen hammer for controlled, even strikes.
- Masking tape: To mark stamp placement and protect surrounding areas.
- Safety gear: Safety glasses and gloves to protect against metal shavings.
- Cleaning supplies: Rubbing alcohol, microfiber cloth, and degreaser to clean the clubhead.
- Paint fill: Acrylic paint or nail polish to highlight stamped designs.
- Vice or clamp: To secure the clubhead during stamping.
Additionally, consider investing in a stamp alignment jig for precise placement, especially for intricate designs. Websites like GolfWorks offer professional-grade tools for club customization.
Step-by-Step Guide to Stamping Golf Clubs
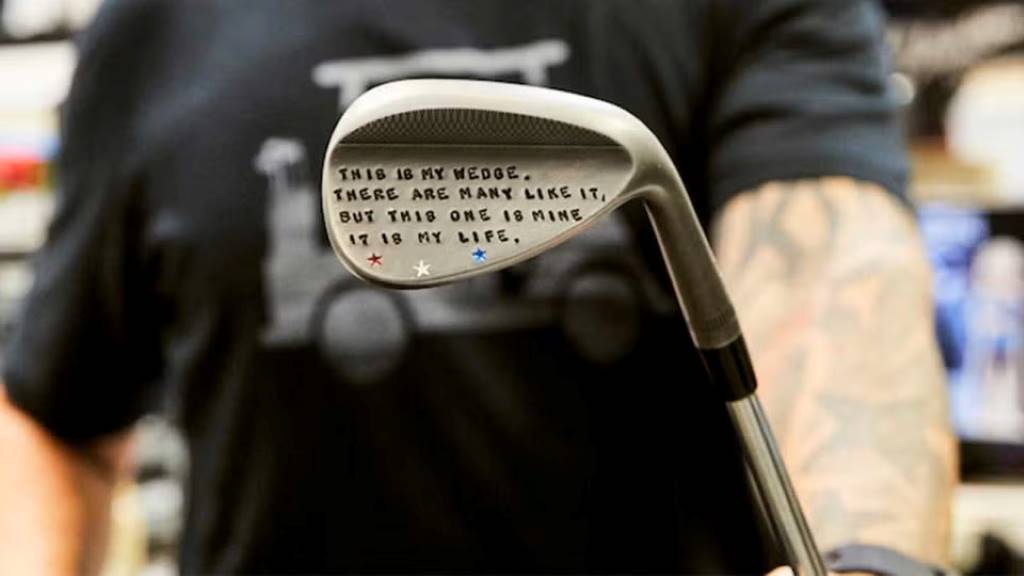
Follow these steps to achieve clean, professional-looking stamps on your golf clubs:
- Prepare the Clubhead: Clean the clubhead thoroughly with rubbing alcohol and a microfiber cloth to remove dirt, oil, or debris. This ensures a smooth stamping surface. If needed, remove the shaft following a reliable guide to avoid damage.
- Secure the Clubhead: Place the clubhead in a vice or clamp, ensuring it’s stable but not overtightened to avoid scratches. Use a cloth or padding to protect the clubhead’s finish.
- Mark Stamp Placement: Apply masking tape to the area you want to stamp. Use a fine-tip marker to outline your design or letters. This step helps with alignment and prevents mistakes.
- Test Stamping: Practice on a piece of scrap metal with similar hardness to your clubhead. This allows you to gauge the force needed for clear impressions without damaging the club.
- Stamp the Design: Position the metal stamp on the marked area, holding it firmly and perpendicular to the surface. Strike the stamp with the hammer using controlled, even force. Start with a light tap to create a shallow impression, then deepen it with additional strikes if needed. Repeat for each letter or design element.
- Clean and Inspect: Remove the masking tape and clean the clubhead again with rubbing alcohol. Inspect the stamps for clarity and depth. If necessary, re-stamp lightly to refine the impressions.
- Apply Paint Fill: Use a small brush or toothpick to apply acrylic paint or nail polish to the stamped impressions. Let it dry for 10-15 minutes, then wipe away excess paint with a cloth dampened with acetone or nail polish remover for a polished look.
- Reassemble the Club: If you removed the shaft, reattach it using epoxy and follow proper curing instructions. Ensure the club is fully functional before use.
Tips for Successful Stamping
To achieve the best results, consider these practical tips:
- Start Simple: Begin with basic designs like initials or numbers to build confidence before attempting complex patterns.
- Use Consistent Force: Uneven hammer strikes can lead to shallow or misaligned stamps. Practice maintaining steady pressure.
- Protect the Finish: Apply multiple layers of masking tape around the stamping area to prevent accidentalolgo accidental scratches.
- Work in a Well-Lit Area: Good lighting helps with precision and reduces errors during stamping.
- Check Material Compatibility: Ensure your stamps are suitable for the clubhead’s material to avoid damage.
For advanced techniques, resources like Golf Digest offer articles on club customization that can inspire creative ideas.
Common Mistakes to Avoid
Stamping golf clubs at home is straightforward but not without challenges. Here are common pitfalls and how to avoid them:
- Overstriking: Hitting the stamp too hard can deform the clubhead. Use light, incremental strikes to control depth.
- Poor Alignment: Misaligned stamps can ruin the design. Use a jig or ruler to ensure even spacing.
- Inadequate Cleaning: Residual oil or dirt can affect stamp clarity. Clean thoroughly before and after stamping.
- Wrong Tools: Using low-quality stamps or hammers can lead to inconsistent results. Invest in reliable equipment.
By taking your time and following these guidelines, you can avoid costly mistakes and achieve professional-quality results.
Read Also:
What is the Hardest Hole of Golf in the World?
How to Support Sustainable Surf Brands That Protect Our Oceans
Adding Paint for Visual Appeal
Paint filling is optional but highly effective for making stamps stand out. Choose vibrant colors like red, blue, or white for contrast against the metal surface. Apply the paint carefully to avoid smudging, and use a high-quality topcoat sealant to protect the design from wear. Allow the paint to dry completely before handling or reassembling the club to prevent smudging.
Reassembling and Testing the Club
Once stamping and painting are complete, reassemble the club if the shaft was removed. Use high-strength epoxy to secure the shaft, following manufacturer guidelines for curing time (typically 24 hours). Test the club by gently swinging it to ensure the head and shaft are properly aligned and secure. If you notice any issues, consult a professional club fitter to avoid performance problems.
FAQs
What types of golf clubs are best for stamping?
Irons and wedges made of soft metals like carbon steel or stainless steel are ideal for stamping. Avoid titanium or composite clubheads, as they are too hard for home stamping tools.
Do I need to remove the shaft to stamp a golf club?
While not always necessary, removing the shaft provides better access and stability. Refer to a guide on how to remove shaft from golf club for safe instructions.
How long does the stamping process take?
The process typically takes 30-60 minutes per club, depending on your experience and the complexity of the design. Preparation and cleaning are the most time-consuming steps.
Can I stamp golf clubs without a vice?
A vice is recommended for stability, but you can use a sturdy workbench and clamps. Ensure the clubhead is secure to prevent movement during stamping.
What kind of paint should I use for filling stamps?
Acrylic paint or high-quality nail polish works well for filling stamps. Use a sealant to protect the paint from chipping during play.
Conclusion
Custom golf club stamping at home is a fun and creative way to personalize your equipment, making it uniquely yours. By following the steps outlined above—preparing the clubhead, using quality tools, and applying careful techniques—you can achieve professional results without expensive equipment. Whether you’re adding initials, dates, or custom designs, this process allows you to express your style while maintaining the club’s functionality. With practice and patience, you’ll master the art of stamping and enjoy the satisfaction of playing with custom-crafted clubs.